


Ads are a necessary evil. Many websites and applications are providing you with free service, free content and free software because someone else is paying them to keep them up. Thus, the service provider has to serve ads to you in return for the income that is keeping them in business, and in development. As the user, you reap the benefit of using the product for free.

However, sometimes the ad placements can be really annoying, contributing to not-so-appealing user experience. In this post we will look at methods to block ads from showing up on Android. You can block ads from appearing in apps and games, or only on browsers.
The methods here may work for both rooted and non-rooted devices. It will be specified for each method. Before we begin, you need a File Manager, e.g. Astro File Manager. Any other file manager will work fine.
Disclaimer: Attempt ad-blocking at your own risk. We cannot be held responsible for any effects on your device resulting from these methods.
1. Adblock Plus (ABP)
This method uses ad-blockers (apps) to block all ads in your device, including the ads shown in various apps and games. There are many ad-blockers for Android, thanks to the ever-growing Android developers. The top two would be Adblock Plus (ABP) and AdAway; we wil discuss the former, but you can install AdAway if that’s your preference.
Using Adblock Plus
We’re going with Adblock Plus as it is an open source project and has the option to allow non-intrusive ads. This method works for both rooted and non-rooted devices. Installing an ad-blocker app requires your device to allow applications from unknown sources.
Sideloading is required as Google has removed ad-block apps from Google Play Store. You need to sideload any ad-blocker, i.e. install ad-blockers using its APK file and not from Google Play Store.
Follow the given steps to set this configuration:
Go to Settings > Applications (or Security on 4.0 and above) on your Android device.
Navigate to the Unknown sources option.
If unchecked, tap the checkbox, and then tap OK on the confirmation popup.
Your Android device is ready to install ad-blockers.
Installing And Configuring Adblock Plus
1. Open a browser in your device and download Adblock Plus for Android. Your device will receive the APK file: adblockplusandroid-version.apk.
2. Navigate to where your downloaded files are kept, then tap on the file and install. (If you open the APK file using a file manager, select Open App Manager and then click on Install.)
3.1 On rooted devices: after installing, open Adblock Plus. It will request for super user permissions. Allow super user permissions to Adblock Plus and you are good to go.
3.2 On non-rooted devices: you need a few more steps, to manually set up proxy in your Android. You will need to follow the instructions here as instructions are different for Android versions up to 3.1 and 4.0+.s
Now Adblock Plus will start blocking ads. You can set more options in Adblock Plus like ads filter lists, non-intrusive ads, etc in Settings.

Adblock Plus – Browser Extension
Adblock Plus is also available as a browser extension for Firefox. With this method, only the ads shown on web pages inside the browser are blocked. Ads in apps or games are not affected. This method works for rooted as well as non-rooted devices.
Setting Up Adblock Plus (Extension)
1. If you are not using Firefox as a browser on your Android yet, get it here. Run the browser on your device and go to the Adblock Plus add-on here. Add it to Firefox and Install it.
2. Restart Firefox and browse ad-free. You can set more options in Adblock Plus by going to the Menu > Adblock Plus and going through the options you can configure.
2. Block Ads Using ‘Hosts’ File
This method uses ‘hosts’ file to block ads. This method blocks all ads in your device, including the ones shown in various apps and games. This method works only for rooted devices.
What Is A ‘Hosts’ File?
‘hosts’ file is a plain-text file in an operating system to map hostnames (like anything.com) to its IP address. Whenever you try to launch a website using its hostname, the operating system will usually search the ‘hosts’ file to find the corresponding IP address first.
If the search is successful, then its mapped IP address is used; otherwise a query is sent to DNS (Domain Name Service) to find the IP address of that hostname.
Setting Up ‘Hosts’ File
1. On the computer, open MVPS (or pgl.yoyo.org or hostfile.mine.nu) on your browser. A plain-text page will open. Save this page as the name hosts in the computer.
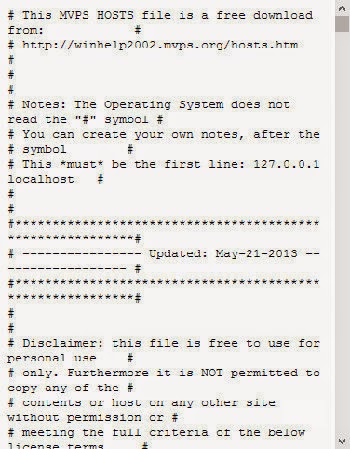
2. Using Bluetooth or a USB connection, copy this hosts file from your computer to your Android device. Note the file path.
3. On your Android, open the file manager in your device and copy the hosts file to /etc or /system/etc. Accessing this location may require you to ‘allow super user permissions’ to the file manager.

4. Rename the original hosts file (if present) to a .txt or .bak extension. Paste the saved hosts file here. Reboot your Android and your Android is now ad-free.
Wrap Up
Although ads are annoying, they are also a great way to try out new apps, products or sites. Allowing non-intrusive ads is a way to be exposed to these new and sometimes great apps via ads. Alternatively many apps offers you the option to buy an ad-free version of the app, so you can support your favorite apps without being annoyed by the ads.
However, sometimes the ad placements can be really annoying, contributing to not-so-appealing user experience. In this post we will look at methods to block ads from showing up on Android. You can block ads from appearing in apps and games, or only on browsers.
The methods here may work for both rooted and non-rooted devices. It will be specified for each method. Before we begin, you need a File Manager, e.g. Astro File Manager. Any other file manager will work fine.
Disclaimer: Attempt ad-blocking at your own risk. We cannot be held responsible for any effects on your device resulting from these methods.
1. Adblock Plus (ABP)
This method uses ad-blockers (apps) to block all ads in your device, including the ads shown in various apps and games. There are many ad-blockers for Android, thanks to the ever-growing Android developers. The top two would be Adblock Plus (ABP) and AdAway; we wil discuss the former, but you can install AdAway if that’s your preference.
Using Adblock Plus
We’re going with Adblock Plus as it is an open source project and has the option to allow non-intrusive ads. This method works for both rooted and non-rooted devices. Installing an ad-blocker app requires your device to allow applications from unknown sources.
Sideloading is required as Google has removed ad-block apps from Google Play Store. You need to sideload any ad-blocker, i.e. install ad-blockers using its APK file and not from Google Play Store.
Follow the given steps to set this configuration:
Go to Settings > Applications (or Security on 4.0 and above) on your Android device.
Navigate to the Unknown sources option.
If unchecked, tap the checkbox, and then tap OK on the confirmation popup.
Your Android device is ready to install ad-blockers.
Installing And Configuring Adblock Plus
1. Open a browser in your device and download Adblock Plus for Android. Your device will receive the APK file: adblockplusandroid-version.apk.
2. Navigate to where your downloaded files are kept, then tap on the file and install. (If you open the APK file using a file manager, select Open App Manager and then click on Install.)
3.1 On rooted devices: after installing, open Adblock Plus. It will request for super user permissions. Allow super user permissions to Adblock Plus and you are good to go.
3.2 On non-rooted devices: you need a few more steps, to manually set up proxy in your Android. You will need to follow the instructions here as instructions are different for Android versions up to 3.1 and 4.0+.s
Now Adblock Plus will start blocking ads. You can set more options in Adblock Plus like ads filter lists, non-intrusive ads, etc in Settings.
Adblock Plus – Browser Extension
Adblock Plus is also available as a browser extension for Firefox. With this method, only the ads shown on web pages inside the browser are blocked. Ads in apps or games are not affected. This method works for rooted as well as non-rooted devices.
Setting Up Adblock Plus (Extension)
1. If you are not using Firefox as a browser on your Android yet, get it here. Run the browser on your device and go to the Adblock Plus add-on here. Add it to Firefox and Install it.
2. Restart Firefox and browse ad-free. You can set more options in Adblock Plus by going to the Menu > Adblock Plus and going through the options you can configure.
2. Block Ads Using ‘Hosts’ File
This method uses ‘hosts’ file to block ads. This method blocks all ads in your device, including the ones shown in various apps and games. This method works only for rooted devices.
What Is A ‘Hosts’ File?
‘hosts’ file is a plain-text file in an operating system to map hostnames (like anything.com) to its IP address. Whenever you try to launch a website using its hostname, the operating system will usually search the ‘hosts’ file to find the corresponding IP address first.
If the search is successful, then its mapped IP address is used; otherwise a query is sent to DNS (Domain Name Service) to find the IP address of that hostname.
Setting Up ‘Hosts’ File
1. On the computer, open MVPS (or pgl.yoyo.org or hostfile.mine.nu) on your browser. A plain-text page will open. Save this page as the name hosts in the computer.
2. Using Bluetooth or a USB connection, copy this hosts file from your computer to your Android device. Note the file path.
3. On your Android, open the file manager in your device and copy the hosts file to /etc or /system/etc. Accessing this location may require you to ‘allow super user permissions’ to the file manager.
4. Rename the original hosts file (if present) to a .txt or .bak extension. Paste the saved hosts file here. Reboot your Android and your Android is now ad-free.
Wrap Up
Although ads are annoying, they are also a great way to try out new apps, products or sites. Allowing non-intrusive ads is a way to be exposed to these new and sometimes great apps via ads. Alternatively many apps offers you the option to buy an ad-free version of the app, so you can support your favorite apps without being annoyed by the ads.


